Shrink Wrap Tips: Packing Furniture & More
April 28, 2018 | Home Organization
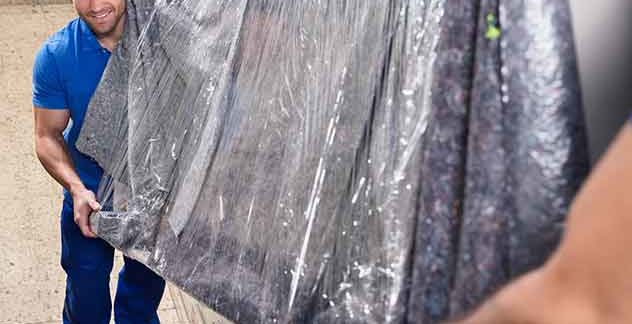
Knowing how to shrink wrap furniture and awkward items can save you a lot of hassle during a move. Here’s how to shrink wrap and keep household items secure and protected during your next move.
Taking the time to shrink wrap will save you from worrying about damage from dirt, and it will keep loose things like wires and drawers in place.
Better yet, shrink-wrap, when appropriately done won’t stick to your furniture or leave ugly marks. Unlike tape, it doesn’t have an adhesive backing. It sticks to itself, and that’s it!
Professional movers know how to shrink wrap furniture and will typically offer to shrink wrap your items as one of their services. However, be prepared to pay extra. If you’re looking to save money, you can avoid additional moving fees by shrink wrapping your own furniture and items.
Doing it yourself will give you the same protection at a fraction of the cost.
Before you buy shrink wrap, first consider which items or furniture you want to wrap. While a lot of items can be shrink-wrapped, it’s not necessary or cost-effective to wrap everything.
By carefully selecting the things you want to protect, you’ll avoid wasting shrink wrap on furniture or items that would be fine without it.
Here’s a list of furniture and items that are commonly shrink-wrapped. As you go through the list, think of your household items and prioritize anything that is particularly valuable or worth keeping secure.
Upholstered furniture
- Shrink wrap will keep it from getting dusty or dirty.
- Loose or awkward items (curtain rods, table legs, etc.). With shrink wrap, these items will take up less space, be easier to carry and be better protected from damage.
Furniture with doors or drawers
- Shrink wrap will keep these in place, so they won’t open or swing-out.
Cables and power cords
- Shrink wrap will prevent the wires from dragging on the floor and getting tripped on.
Rugs and mats
- Shrink wrap will keep them firmly rolled up.
Greasy or dirty items (oil cans, gardening tools, etc.)
- Shrink wrap will prevent these items from getting grease or dirt on other items.
Silverware
- You can stack the silverware, then shrink-wrap each stack to keep it together. Then, the forks, knives, and spoons won’t come loose in a box.
Boxes or containers with small objects, like toys or jewelry
- With shrink wrap, you won’t have to worry about the box or container accidentally falling open and letting everything spill out. The lid will stay closed.
Anything valuable that’s difficult to pack (picture frames, bulletin boards, etc.).
- In particular, shrink wrap any hard-to-pack items that can get scratched or easily damaged. Consider using bubble wrap first, then wrapping the bubble wrap in shrink wrap so it’ll stay put.
Note: Never put shrink wrap directly on wood or leather furniture. Moisture can get trapped between the furniture and the plastic, causing mildew, mold, or warping.
Instead, use paper padding or a moving blanket to wrap the leather/wooden furniture. Then, use shrink wrap to keep the paper padding on the furniture.
After making a list of items you want to shrink wrap, you’ll have a general idea of how much shrink wrap you’ll need. You can typically buy shrink wrap at any store with a good range of moving supplies, including a Metro Self Storage facility.
Aim to get a little more than you think you’ll need. You can always use the extra for additional items.
With more than 40 years of storage experience, Metro Self Storage is one of the nation’s most respected self storage providers. All of our storage facilities offer moving supplies such as boxes, tape, locks, furniture padding, and of course, shrink wrap.
Visit us online at Metro Storage to find reliable, affordable, and sparkling clean storage for your next move.
For each item or piece of furniture you’re shrink wrapping, follow these 7 steps.
1. Clean the item with a dust rag or damp cloth. If wet, make sure it’s dry before wrapping.
2. Remove any parts that are easy to detach, such as chair legs. You’ll wrap them separately so they’ll be easier to move and less likely to get damaged.
3. If you’re wrapping leather/wooden furniture, cover it with paper padding.
4. If the item or piece of furniture has sharp corners, use foam or cardboard to cover the edges before wrapping them. Otherwise, the corners could damage the wall or other items.
5. Start wrapping. For large furniture, you’ll need to hold the roll of plastic as you walk around the piece. Let the plastic unwrap against the furniture. For the first walk around, you might need someone to hold the plastic against the furniture, so it doesn’t fall down. After the first round, the plastic should stick to itself and stay in place.
6. Once the item or furniture is completely wrapped, tear the shrink wrap against the furniture.
7. Move on to the next item!
If you have leftover shrink wrap after preparing your items to load onto the moving truck, consider using extra shrink wrap on jars and bottles of liquid. The plastic will prevent messy spills, should the lid come loose or something breaks.
You don’t even have to wrap the entire bottle or jar. Just remove the lid, wrap the top, and secure the lid tightly.
Knowing how to shrink wrap furniture and awkward items can make the difference between a move that’s stressful, and one that’s smooth and simple.
While it does take extra preparation, it can make your move much easier in the end.


